Introduction
This section introduces the development of extensions for LAND IT and will guide you through the setup process.
Requirements
- Git
- Java / Maven
- npm / Node.js
- To test and install extensions, admin access to a LAND IT instance (preferably, having LAND IT running locally on your PC)
You should also have some knowledge about Java, TypeScript/React (if you intend on doing custom interface modules) and have a solid understanding of LAND IT's basic concepts (scenarios, versions, POSP, POSA, etc.)
Where to start
In LAND IT's extensions repository, you can find a template to use as a starting point. This contains the skeleton of the code for an extension:
src/main: contains the back-end (Java) code of the extension.java: contains the Java code itself (classes, etc.).resources: contains theconfig.jsonfile with the extension's metadata (more about it here).
frontend: contains a small front-end project for the creation of custom UI modules. You can read more about it here.pom.xml: configuration file of the Maven project, including the definition of (back-end) dependencies and the project information.build.sh/build.bat: build script that builds both the front-end and back-end parts of the extension and packages it all together in a JAR file. (.sh for Linux, .bat for Windows).
After downloading the template, there are two things you need to do to get it working:
- Go into the
frontendfolder, and run the commandnpm installto install the necessary dependencies. - Go back to the root folder, and build the project using the provided build script (
build.shorbuild.batdepending on your platform).
When the build finishes, you should be able to find a JAR file in the target folder (for example, Template-1.0.jar). This file is what you need to install the extension in LAND IT.
Installing the extension
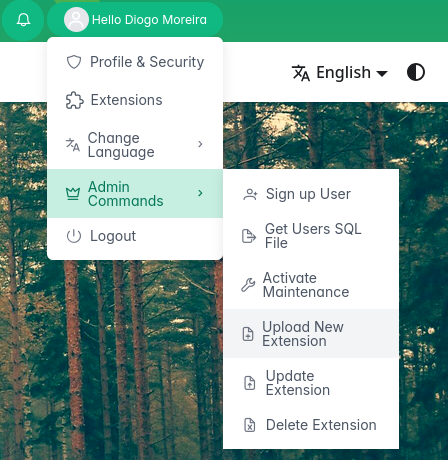
After building the extension, you can try installing it. To do that, go to the "Admin commands" options and choose the option to upload a new extension:
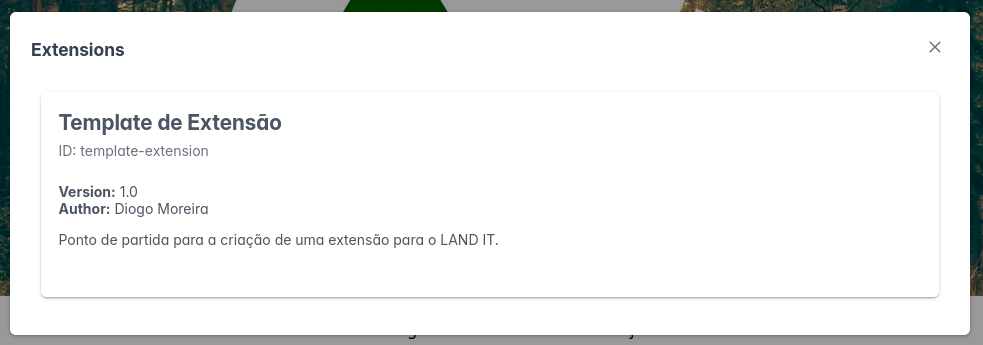
If the upload and installation is successful, you will now be able to see your extension in the extensions' window:
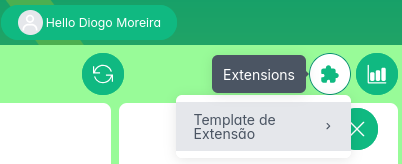
You will also now find the options to use the extension features from the scenario editing page, in the top right corner (puzzle icon):
What now?
If you got this far, congratulations! You're now ready to start making your own LAND IT extension. It is highly recommended that you keep reading the Extension Development documentation to learn more about how to develop LAND IT extensions.
Don't forget to change the extension ID and name on the config.json file (alongside other information, such as putting your name as the author). You can also change the pom.xml file (artifactId and version).